Prerequisites
Before getting started, make sure you have completed the following steps:
Create an Auth0 Application
Go to your
Auth0 Dashboard to create a new Auth0 Application.
- Navigate to Applications > Applications in the left sidebar.
- Click the Create Application button in the top right.
- In the pop-up select Regular Web Applications and click Create.
- Once the Application is created, switch to the Settings tab.
- Scroll down to the Application URIs section.
- Set Allowed Callback URLs as:
http://localhost:3000/auth/callback - Set Allowed Logout URLs as:
http://localhost:3000 - Click Save in the bottom right to save your changes.
To learn more about Auth0 applications, read
Applications.
Create a Next.js app
Use a starter template or create a Next.js web application using Next.js version 15 or above.Recommended: Use this starter template from the Auth0 AI samples repository:git clone https://github.com/auth0-samples/auth0-ai-samples.git
cd auth0-ai-samples/authenticate-users/vercel-ai-next-js-starter
npx create-next-app@15 --src-dir
Install dependencies
In the root directory of your project, install the Auth0 Next.js SDK:npm i @auth0/nextjs-auth0@4
Add log in to your application
Secure your application using the Auth0 Next.js SDK.Create your environment file
In the root directory of your project, create a new file and name it .env.local and add the following content:APP_BASE_URL='http://localhost:3000'
AUTH0_SECRET='random 32 byte value'
AUTH0_DOMAIN='<your-auth0-domain>'
AUTH0_CLIENT_ID='<your-auth0-application-client-id>'
AUTH0_CLIENT_SECRET='<your-auth0-application-client-secret>'
AUTH0_DOMAIN, AUTH0_CLIENT_ID, and AUTH0_CLIENT_SECRET by viewing the Auth0 Application that you created in the Auth0 Dashboard and navigating to the Basic Information section at the top of the Settings tab.
Copy each value to the matching setting.Next, run this command to generate a random 32 byte value and copy it to the AUTH0_SECRET field.generate random 32 byte value
Create the Auth0 client
Create a new file in the src/lib directory and name it auth0.ts. Add the following code to create a new Auth0 client:import { Auth0Client } from "@auth0/nextjs-auth0/server";
// Create an Auth0 Client.
export const auth0 = new Auth0Client();
Add the authentication middleware
The middleware intercepts incoming requests and applies Auth0’s authentication logic. Create a new file in the src directory and name it middleware.ts. Add the following code to the file:import { NextRequest, NextResponse } from "next/server";
import { auth0 } from "./lib/auth0";
export async function middleware(request: NextRequest) {
const authRes = await auth0.middleware(request);
// Authentication routes — let the Auth0 middleware handle it.
if (request.nextUrl.pathname.startsWith("/auth")) {
return authRes;
}
const { origin } = new URL(request.url);
const session = await auth0.getSession(request);
// User does not have a session — redirect to login.
if (!session) {
return NextResponse.redirect(`${origin}/auth/login`);
}
return authRes;
}
export const config = {
matcher: [
/*
* Match all request paths except for the ones starting with:
* - _next/static (static files)
* - _next/image, images (image optimization files)
* - favicon.ico, sitemap.xml, robots.txt (metadata files)
* - $ (root)
*/
"/((?!_next/static|_next/image|images|favicon.[ico|png]|sitemap.xml|robots.txt|$).*)",
],
};
src/app/page.tsx file with the following code to check if the user is signed in or not.
It will display the Sign up or Log in buttons without a user session. If a user session exists, the app displays a welcome message with the user’s name.//...
import { auth0 } from "@/lib/auth0";
export default async function Home() {
const session = await auth0.getSession();
if (!session) {
return (
<div className="flex flex-col items-center justify-center min-h-[50vh] my-auto gap-4">
<h2 className="text-xl">You are not logged in</h2>
<div className="flex gap-4">
<Button asChild variant="default" size="default">
<a href="/auth/login" className="flex items-center gap-2">
<LogIn />
<span>Login</span>
</a>
</Button>
<Button asChild variant="default" size="default">
<a href="/auth/login?screen_hint=signup">
<UserPlus />
<span>Sign up</span>
</a>
</Button>
</div>
</div>
);
}
//... existing code
// applicable only if you are using the starter template
return (
<ChatWindow
endpoint="api/chat"
emoji="🤖"
placeholder={`Hello ${session?.user?.name}, I'm your personal assistant. How can I help you today?`}
emptyStateComponent={InfoCard}
/>
);
}
Add user profile dropdown (optional)
If you are using the starter template, you can add a user profile dropdown to your application. Update the src/app/layout.tsx file://...
import { auth0 } from "@/lib/auth0";
import UserButton from "@/components/auth0/user-button";
export default async function RootLayout({
children,
}: {
children: React.ReactNode;
}) {
const session = await auth0.getSession();
return (
<html lang="en" suppressHydrationWarning>
{/* ... existing code */}
<body className={publicSans.className}>
<NuqsAdapter>
<div className="bg-secondary grid grid-rows-[auto,1fr] h-[100dvh]">
<div className="grid grid-cols-[1fr,auto] gap-2 p-4 bg-black/25">
{/* ... existing code */}
<div className="flex justify-center">
{session && (
<div className="flex items-center gap-2 px-4 text-white">
<UserButton
user={session?.user!}
logoutUrl="/auth/logout"
/>
</div>
)}
{/* ... existing code */}
</div>
</div>
{/* ... existing code */}
</div>
<Toaster />
</NuqsAdapter>
</body>
</html>
);
}
Run your application
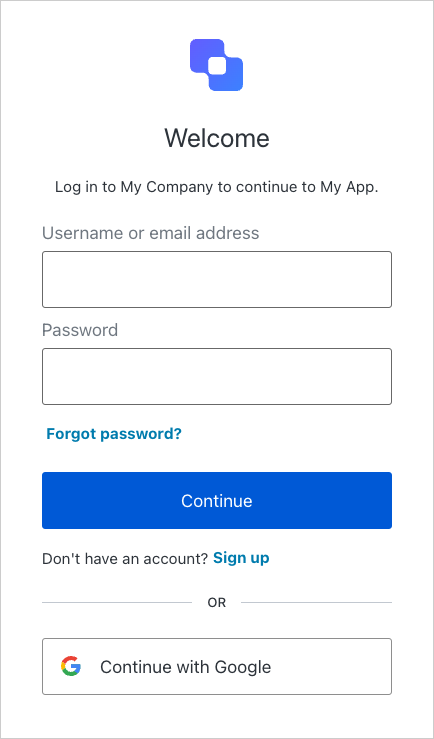
Run this command to start your server:Visit the URL http://localhost:3000 in your browser.You will see:Sign up to your application to create a new user account. You will then see a welcome message with your user name. You can sign in with that account on future visits.View a complete example
Want to see how it all comes together? Explore or clone the fully implemented sample application here on GitHub.Prerequisites
Before getting started, make sure you have completed the following steps:
Create an Auth0 Application
Go to your
Auth0 Dashboard to create a new Auth0 Application.
- Navigate to Applications > Applications in the left sidebar.
- Click the Create Application button in the top right.
- In the pop-up select Regular Web Applications and click Create.
- Once the Application is created, switch to the Settings tab.
- Scroll down to the Application URIs section.
- Set Allowed Callback URLs as:
http://localhost:8000/api/auth/callback - Set Allowed Logout URLs as:
http://localhost:5173 - Click Save in the bottom right to save your changes.
To learn more about Auth0 applications, read
Applications.
Create a FastAPI application
Run the following commands to clone this starter template from the Auth0 AI samples repository:git clone https://github.com/auth0-samples/auth0-ai-samples.git
cd auth0-ai-samples/authenticate-users/langchain-fastapi-py-starter
backend: contains the backend code for the Web application and API written in Python using FastAPI and the LangGraph agent.frontend: contains the frontend code for the Web application written in React as a Vite Single Page App (SPA).
Install dependencies
In the backend directory of your project, install the Auth0 FastAPI SDK for implementing user authentication in FastAPI applications.Ensure you have uv installed or follow the instructions here to install uv.
Run the following command to install the required dependencies:cd backend
uv sync
uv add auth0-fastapi
Add authentication to your application backend
Secure the application using the Auth0 FastAPI SDK.Create your environment file
In the backend directory of your project, create a new file and name it .env and add the following contnet:APP_BASE_URL='http://localhost:3000'
AUTH0_SECRET='random 32 byte value'
AUTH0_DOMAIN='<your-auth0-domain>'
AUTH0_CLIENT_ID='<your-auth0-application-client-id>'
AUTH0_CLIENT_SECRET='<your-auth0-application-client-secret>'
AUTH0_DOMAIN, AUTH0_CLIENT_ID, and AUTH0_CLIENT_SECRET by viewing the Auth0 Application that you created in the Auth0 Dashboard and navigating to the Basic Information section at the top of the Settings tab.
Copy each value to the matching setting.Next, run this command to generate a random 32 byte value and copy it to the AUTH0_SECRET field.generate random 32 byte value
Update the application configuration
Update the configuration settings in app/core/config.py:# ...
class Settings(BaseSettings):
# ...
AUTH0_DOMAIN: str
AUTH0_CLIENT_ID: str
AUTH0_CLIENT_SECRET: str
AUTH0_SECRET: str
APP_BASE_URL: str
# ...
Create the Auth0 client
Create a file in the app/core directory and name it auth.py. Add the following code to create a new Auth0 client:from auth0_fastapi.auth import AuthClient
from auth0_fastapi.config import Auth0Config
from auth0_fastapi.server.routes import router as auth_router, register_auth_routes
from app.core.config import settings
auth_config = Auth0Config(
domain=settings.AUTH0_DOMAIN,
client_id=settings.AUTH0_CLIENT_ID,
client_secret=settings.AUTH0_CLIENT_SECRET,
secret=settings.AUTH0_SECRET,
app_base_url=f"{settings.APP_BASE_URL}{settings.API_PREFIX}",
mount_routes=True,
mount_connect_routes=True,
authorization_params={
"scope": "openid profile email offline_access",
},
)
auth_client = AuthClient(auth_config)
register_auth_routes(auth_router, auth_config)
Add the authentication middleware
Update the app/main.py file to include the authentication middleware:# ...
from starlette.middleware.sessions import SessionMiddleware
from app.core.auth import auth_client
# ...
# Set the session middleware
app.add_middleware(SessionMiddleware, secret_key=settings.AUTH0_SECRET)
# Save auth state
app.state.auth_client = auth_client
# ...
Add the authentication routes
Update the app/api/api_router.py file to include the authentication routes:# ...
from app.core.auth import auth_router
# ...
api_router.include_router(auth_router, tags=["auth"])
Add authentication to your application frontend
Add log in and sign up buttons to your application frontend.Ensure you have npm installed or follow the instructions here to install npm.
Navigate to the frontend directory of your project and install the required dependencies:Add an authentication utilities file
In the src/lib directory create a new file and name it use-auth.ts. Add the following code to the file:import { useQuery } from "@tanstack/react-query";
import { apiClient } from "./api-client";
export default function useAuth() {
const { data: user, isLoading } = useQuery({
queryKey: ["user"],
queryFn: async () => {
return (await apiClient.get("/api/auth/profile")).data?.user;
},
});
return {
user,
isLoading,
};
}
export function getLoginUrl() {
return `${import.meta.env.VITE_API_HOST}/api/auth/login?returnTo=${
window.location
}`;
}
export function getSignupUrl() {
return `${import.meta.env.VITE_API_HOST}/api/auth/login?screen_hint=signup`;
}
export function getLogoutUrl() {
return `${import.meta.env.VITE_API_HOST}/api/auth/logout?returnTo=${
window.location
}`;
}
src/pages/ChatPage.tsx file with the following code to check if the user is signed in or not.
It will display the Sign up or Log in buttons without a user session. If a user session exists, the app displays a welcome message with the user’s name.//...
import useAuth, { getLoginUrl, getSignupUrl } from "@/lib/use-auth";
import { Button } from "@/components/ui/button";
import { LogIn, UserPlus } from "lucide-react";
export default function ChatPage() {
const { user, isLoading } = useAuth();
if (isLoading) {
return <div>Loading...</div>;
}
if (!user) {
return (
<div className="flex flex-col items-center justify-center min-h-[50vh] my-auto gap-4">
<h2 className="text-xl">You are not logged in</h2>
<div className="flex gap-4">
<Button asChild variant="default" size="default">
<a href={getLoginUrl()} className="flex items-center gap-2">
<LogIn />
<span>Login</span>
</a>
</Button>
<Button asChild variant="default" size="default">
<a href={getSignupUrl()} className="flex items-center gap-2">
<UserPlus />
<span>Sign up</span>
</a>
</Button>
</div>
</div>
);
}
//... existing code
// applicable only if you are using the starter template
return (
<ChatWindow
endpoint="/api/agent"
emoji="🤖"
placeholder={`Hello ${user?.name}, I'm your personal assistant. How can I help you today?`}
emptyStateComponent={InfoCard}
/>
);
}
Add user profile dropdown (optional)
If you are using the starter template, you can add a user profile dropdown to your application. Update the src/components/layout.tsx file:src/components/layout.tsx
//...
import useAuth, { getLogoutUrl } from "@/lib/use-auth";
import UserButton from "@/components/auth0/user-button";

export default function Layout() {
  const { user } = useAuth();

  return (
    <div className="bg-secondary grid grid-rows-[auto_1fr] h-[100dvh]">
      <div className="grid grid-cols-[1fr_auto] gap-2 p-4 bg-black/25">
        {/* ... existing code */}
        <div className="flex justify-center">
          {user && (
            <div className="flex items-center gap-2 px-4 text-white">
              <UserButton user={user} logoutUrl={getLogoutUrl()} />
            </div>
          )}
          {/* ... existing code */}
        </div>
      </div>
    </div>
  );
}
Run your application
To run your application, start both the FastAPI backend and the frontend in two terminals:
- In the terminal, start the FastAPI backend:
cd backend
source .venv/bin/activate
fastapi dev app/main.py
- In a new terminal, start the frontend:
cd frontend
cp .env.example .env # Copy the `.env.example` file to `.env`.
npm run dev
http://localhost:5173 in your browser.You will see:Sign up to your application to create a new user account. You will then see a welcome message with your user name. You can sign in with that account on future visits.View a complete example
Want to see how it all comes together? Explore or clone the fully implemented sample application here on GitHub. Next.js
 FastAPI